Setting up a Node
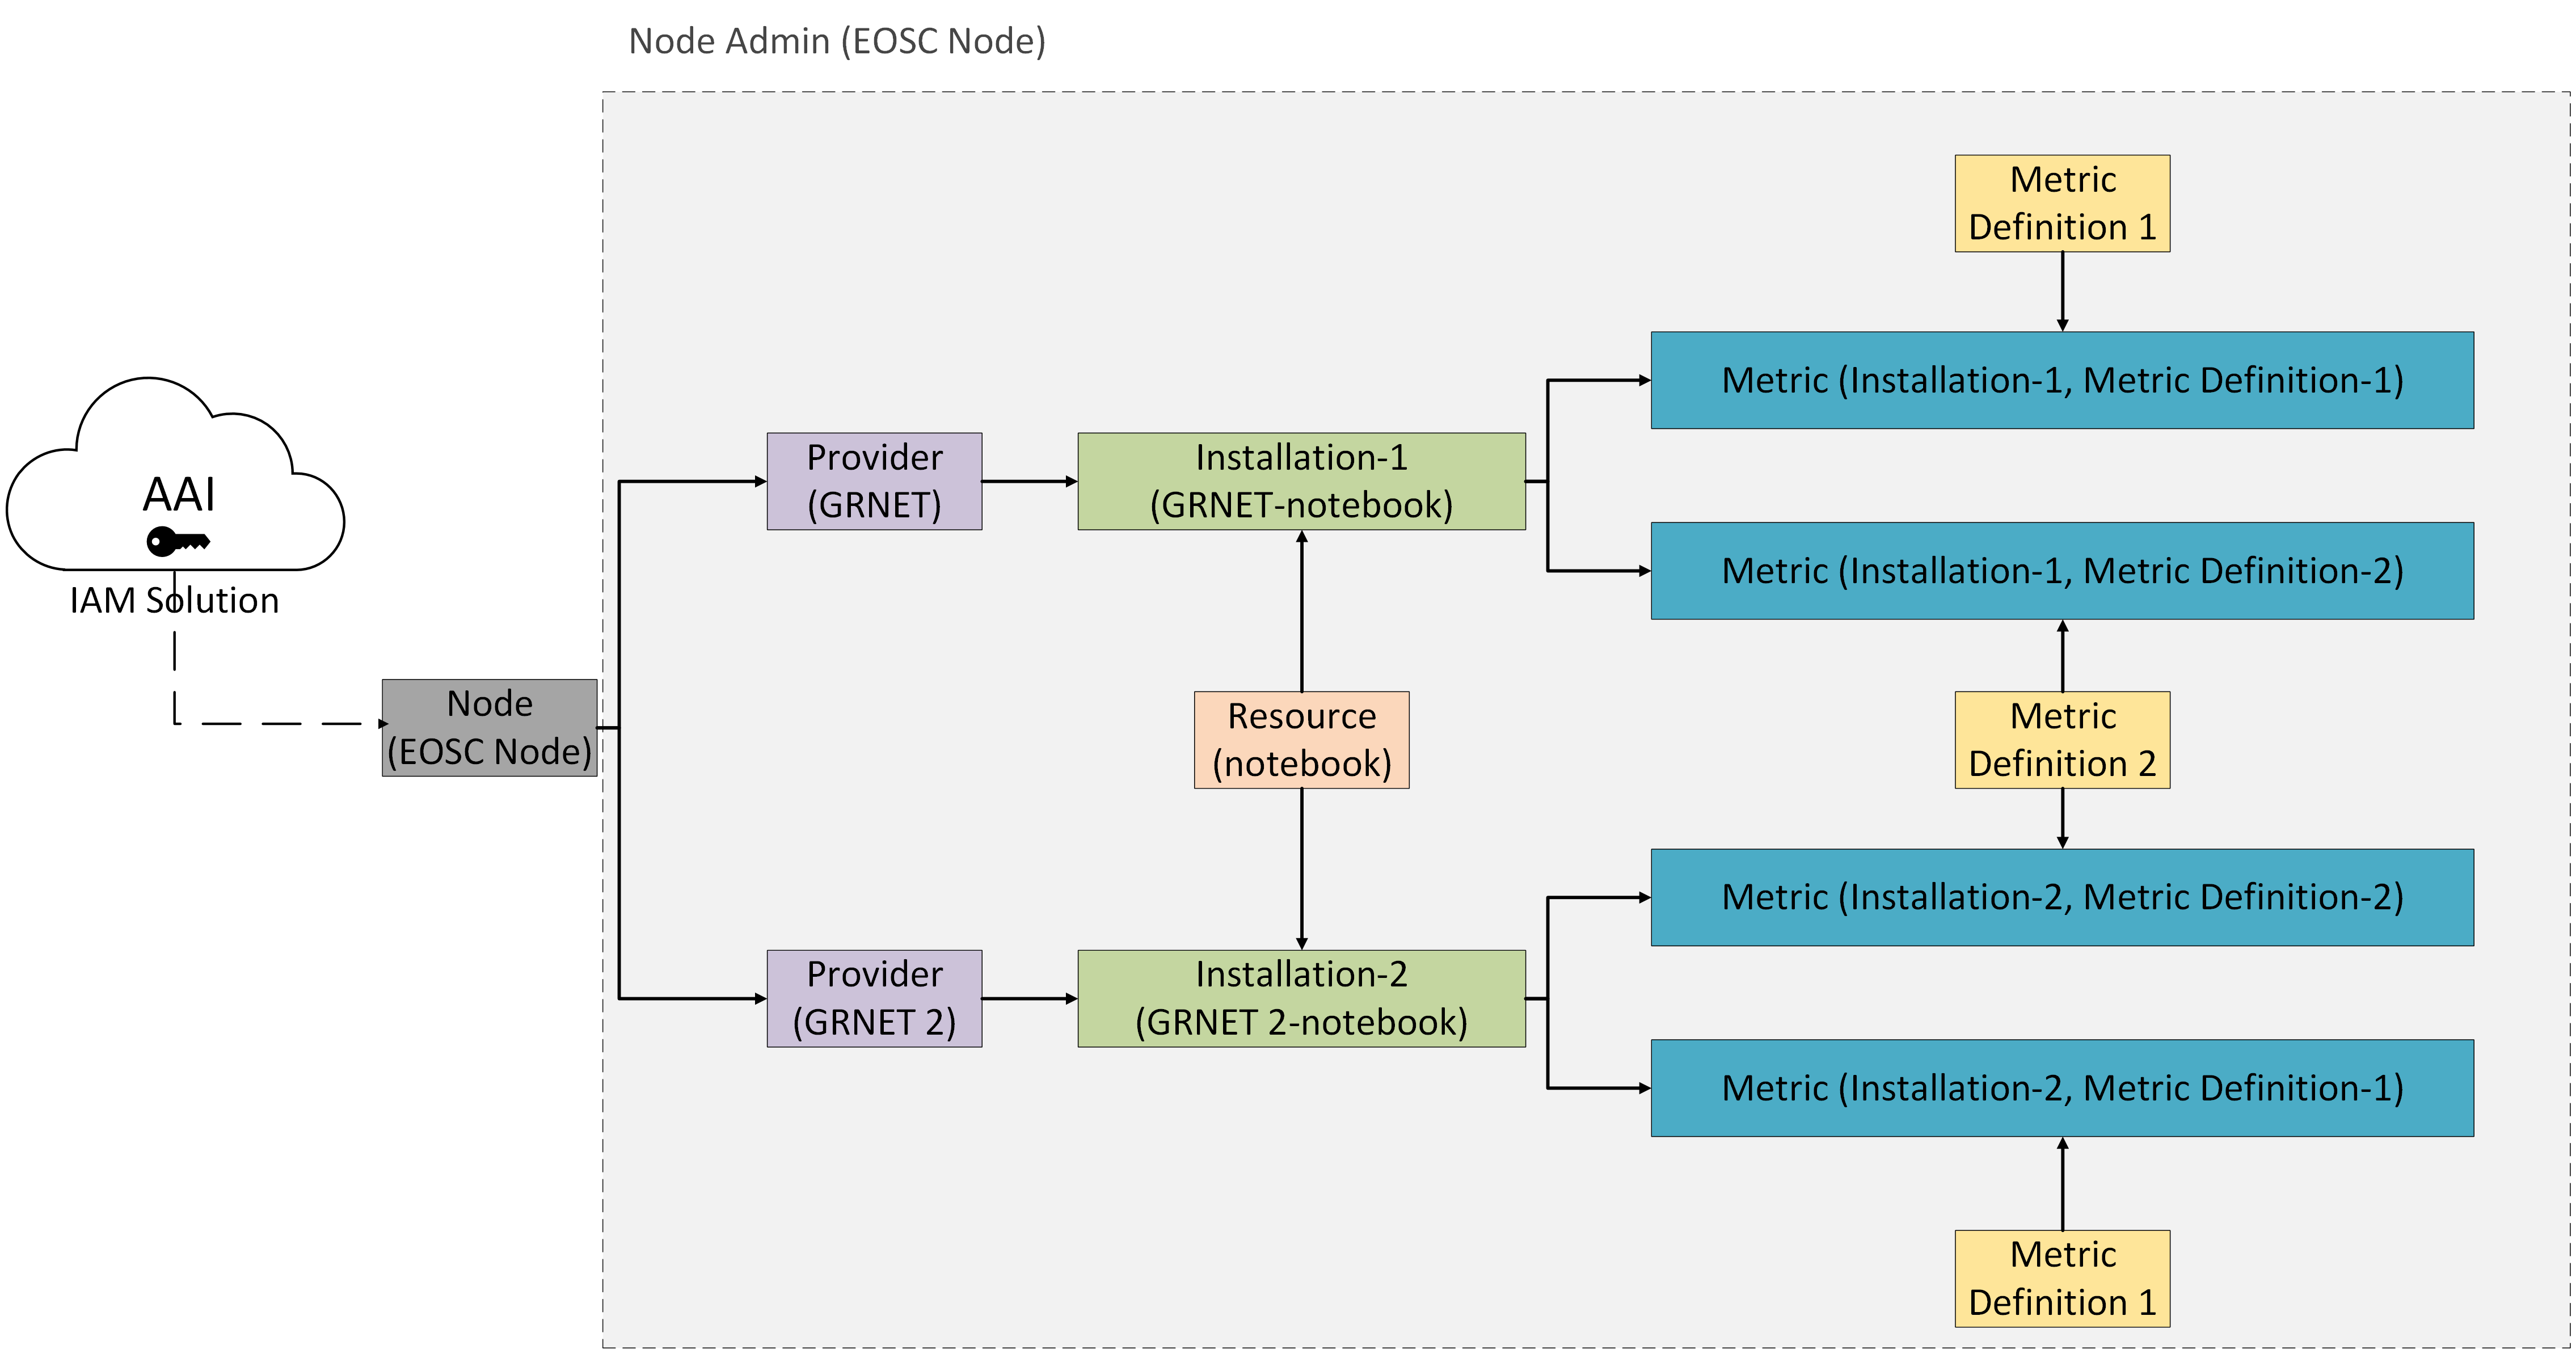
In order to set up a particular Node within the system, you must be the officially designated representative of that Node. In the context of the Accounting System, this role is referred to as the Project Admin. See here how you can obtain that role.
Step 1: Configure OIDC Tenant for Node Authentication
Before users can authenticate, system administrators must register the OpenID Connect (OIDC) tenant configuration with the Accounting System. As a Node Admin, you are responsible for providing this configuration. To initiate the process, a representative of your Node should contact the system administrators and share the following OIDC tenant information:
- issuer:
http://localhost:58080/realms/quarkus - tenant_id:
default - client_id:
backend-service - secret:
secret - authorization_path:
/protocol/openid-connect/auth - introspection_path:
/protocol/openid-connect/token/introspect - user_info_path:
/protocol/openid-connect/userinfo - token_path:
/protocol/openid-connect/token - auth_server_url:
http://localhost:58080/realms/quarkus - user_id_token_claim:
voperson_id - service_id_token_claim:
client_id
Step 2: Associate Providers with the Node
Create a new Provider
-
User Interface To perform this action via the website, please click here and follow the provided instructions.
-
HTTP Request To syntax the HTTP request, please visit the corresponding document.
Connect Providers with the Node
-
User Interface To perform this action via the website, please click here and follow the provided instructions.
-
HTTP Request To syntax the HTTP request, please visit the corresponding document.
Step 3: Create a new Installation and assign it to the associated Providers
Note
As indicated in the Installation documentation, the
unit_of_accessInstallation property must point to an existing Metric Definition. You can either create a new Metric Definition or use an existing one.
View all the Metric Definitions
-
User Interface View Metric Definitions on the website.
-
HTTP Request To syntax the HTTP request, please visit the corresponding document.
Create a new Metric Definition
-
User Interface To perform this action via the website, please click here and follow the provided instructions.
-
HTTP Request To syntax the HTTP request, please visit the corresponding document.
Create a new Installation
-
User Interface To perform this action via the website, please click here and follow the provided instructions.
-
HTTP Request To syntax the HTTP request, please visit the corresponding document.
Step 4: Add Metrics
Add Metrics to a particular Node
-
User Interface To perform this action via the website, please follow the provided instructions.
-
HTTP Request To syntax the HTTP request, please visit the corresponding document.
Add Metrics to a particular Provider
-
User Interface To perform this action via the website, please follow the provided instructions.
-
HTTP Request To syntax the HTTP request, please visit the corresponding document.
Add Metrics to a particular Installation
-
User Interface To perform this action via the website, please follow the provided instructions.
-
HTTP Request To syntax the HTTP request, please visit the corresponding document.